一、集群部署
作者: ryan 发布于: 2025/6/26 更新于: 2025/6/26 字数: 0 字 阅读: 0 分钟
使用 containerd 作为容器运行时搭建 Kubernetes 集群
现在我们使用 kubeadm 从头搭建一个使用 containerd 作为容器运行时的 Kubernetes 集群,这里我们安装最新的 v1.22.2 版本。
参考:https://www.cnblogs.com/tingfengdengyu/articles/17336942.html
1.环境准备
3 个节点,都是 Ubuntu20.04系统,在每个节点上添加 hosts 信息:
tee -a /etc/hosts<<EOF
192.168.10.90 master01
192.168.10.91 node01
192.168.10.92 node02
EOF
mv /etc/apt/sources.list{,.bak}

tee  /etc/apt/sources.list<<EOF
deb http://mirrors.aliyun.com/ubuntu/ focal main restricted universe multiverse
deb-src http://mirrors.aliyun.com/ubuntu/ focal main restricted universe multiverse

deb http://mirrors.aliyun.com/ubuntu/ focal-security main restricted universe multiverse
deb-src http://mirrors.aliyun.com/ubuntu/ focal-security main restricted universe multiverse

deb http://mirrors.aliyun.com/ubuntu/ focal-updates main restricted universe multiverse
deb-src http://mirrors.aliyun.com/ubuntu/ focal-updates main restricted universe multiverse

# deb http://mirrors.aliyun.com/ubuntu/ focal-proposed main restricted universe multiverse
# deb-src http://mirrors.aliyun.com/ubuntu/ focal-proposed main restricted universe multiverse

deb http://mirrors.aliyun.com/ubuntu/ focal-backports main restricted universe multiverse
deb-src http://mirrors.aliyun.com/ubuntu/ focal-backports main restricted universe multiverse
EOF

tee  /etc/apt/sources.list<<EOF
# 默认注释了源码镜像以提高 apt update 速度,如有需要可自行取消注释
deb http://mirrors.tuna.tsinghua.edu.cn/ubuntu/ bionic main restricted universe multiverse
# deb-src http://mirrors.tuna.tsinghua.edu.cn/ubuntu/ bionic main restricted universe multiverse
deb http://mirrors.tuna.tsinghua.edu.cn/ubuntu/ bionic-updates main restricted universe multiverse
# deb-src http://mirrors.tuna.tsinghua.edu.cn/ubuntu/ bionic-updates main restricted universe multiverse
deb http://mirrors.tuna.tsinghua.edu.cn/ubuntu/ bionic-backports main restricted universe multiverse
# deb-src http://mirrors.tuna.tsinghua.edu.cn/ubuntu/ bionic-backports main restricted universe multiverse

deb http://security.ubuntu.com/ubuntu/ bionic-security main restricted universe multiverse
# deb-src http://security.ubuntu.com/ubuntu/ bionic-security main restricted universe multiverse

# 预发布软件源,不建议启用
# deb http://mirrors.tuna.tsinghua.edu.cn/ubuntu/ bionic-proposed main restricted universe multiverse
# # deb-src http://mirrors.tuna.tsinghua.edu.cn/ubuntu/ bionic-proposed main restricted universe multiverse
EOF

#更新仓库
apt update1.1 设置时区
#时区
 timedatectl set-timezone Asia/Shanghai

#时间同步
apt install chrony -y
sudo sed -i 's/ntp.ubuntu.com/ntp.aliyun.com/g' /etc/chrony/chrony.conf
systemctl restart chrony && systemctl enable chrony

echo "*/3 * * * * /usr/sbin/chronyc makestep" | sudo tee -a /etc/crontab


#selinux
~ cat /etc/selinux/config
SELINUX=disabled
#ubuntu 没有安装selinux


# Ubuntu安全软件的限制,可能导致节点处于notReady状态,所以需要关闭
# 停止安全应用 apparmor
systemctl stop apparmor
# 禁用安全限制
systemctl disable apparmor1.2 关闭ufw服务
# 关闭ufw服务
systemctl stop ufw && systemctl disable ufw
# 关闭iptables服务
systemctl stop iptables
systemctl disable iptables1.3 关闭交换空间
## 关闭交换空间
sudo swapoff -a
# 永久禁用。-i 插入修改模式,g 标识符表示全局查找替换,表示注释掉swap的那一行。
sudo sed -i '/swap/ s/^/#/g' /etc/fstab
# 查看禁用状态
free -h2.
#开启内核模块
modprobe nf_conntrack && modprobe br_netfilter


#配置内核参数
sudo tee /etc/sysctl.d/kubernetes.conf<<EOF
net.ipv4.ip_forward = 1
vm.max_map_count = 262144
kernel.pid_max = 4194303
fs.file-max = 1000000
net.ipv4.tcp_max_tw_buckets = 6000
net.ipv4.tcp_keepalive_intvl = 30
net.ipv4.tcp_keepalive_probes = 10
net.ipv4.tcp_keepalive_time = 600
net.netfilter.nf_conntrack_max = 2097152
net.bridge.bridge-nf-call-ip6tables = 1
net.bridge.bridge-nf-call-iptables = 1
vm.swappiness = 0
EOF

# 重新加载配置
sysctl -p /etc/sysctl.d/kubernetes.conf
net.ipv4.ip_forward = 1
vm.max_map_count = 262144
kernel.pid_max = 4194303
fs.file-max = 1000000
net.ipv4.tcp_max_tw_buckets = 6000
net.ipv4.tcp_keepalive_intvl = 30
net.ipv4.tcp_keepalive_probes = 10
net.ipv4.tcp_keepalive_time = 600
net.netfilter.nf_conntrack_max = 2097152
net.bridge.bridge-nf-call-ip6tables = 1
net.bridge.bridge-nf-call-iptables = 1
vm.swappiness = 0


#添加内核模块开机挂载

sudo tee -a /etc/modules-load.d/modules.conf<<EOF
ip_vs
ip_vs_lc
ip_vs_lblc
ip_vs_lblcr
ip_vs_rr
ip_vs_wrr
ip_vs_sh
ip_vs_dh
ip_vs_fo
ip_vs_nq
ip_vs_sed
ip_vs_ftp
ip_vs_sh
ip_tables
ip_set
ipt_set
ipt_rpfilter
ipt_REJECT
ipip
xt_set
br_netfilter
nf_conntrack
overlay
EOF#重启后验证内核模块与内存参数
reboot
lsmod | grep br_netfilter
br_netfilter 28672 0
bridge 176128 1 br_netfilter
sysctl -a | grep bridge-nf-call-iptables
net.bridge.bridge-nf-call-iptables = 13.安装IPVS
apt install ipset ipvsadm -y

#验证
lsmod | grep -e ip_vs -e nf_conntrack

ip_vs_ftp              16384  0
nf_nat                 49152  2 openvswitch,ip_vs_ftp
ip_vs_sed              16384  0
ip_vs_nq               16384  0
ip_vs_fo               16384  0
ip_vs_dh               16384  0
ip_vs_sh               16384  0
ip_vs_wrr              16384  0
ip_vs_rr               16384  0
ip_vs_lblcr            16384  0
ip_vs_lblc             16384  0
ip_vs_lc               16384  0
ip_vs                 176128  22 ip_vs_rr,ip_vs_dh,ip_vs_lblcr,ip_vs_sh,ip_vs_fo,ip_vs_nq,ip_vs_lblc,ip_vs_wrr,ip_vs_lc,ip_vs_sed,ip_vs_ftp
nf_conntrack          172032  4 nf_nat,openvswitch,nf_conncount,ip_vs
nf_defrag_ipv6         24576  3 nf_conntrack,openvswitch,ip_vs
nf_defrag_ipv4         16384  1 nf_conntrack
libcrc32c 16384 6 nf_conntrack,nf_nat,openvswitch,btrfs,raid456,ip_vs二、安装Containerd
三个版本区别
root@master1:~# apt-cache madison containerd
containerd | 1.7.2-0ubuntu1~22.04.1 | http://mirrors.aliyun.com/ubuntu jammy-updates/main amd64 Packages
containerd | 1.6.12-0ubuntu1~22.04.3 | http://mirrors.aliyun.com/ubuntu jammy-security/main amd64 Packages
containerd | 1.5.9-0ubuntu3 | http://mirrors.aliyun.com/ubuntu jammy/main amd64 Packages1.2、安装 containerd
apt install -y containerd=1.6.12-0ubuntu1~22.04.1
1.3、查看 containerd service 文件
 cat /lib/systemd/system/containerd.service
# Copyright The containerd Authors.
#
# Licensed under the Apache License, Version 2.0 (the "License");
# you may not use this file except in compliance with the License.
# You may obtain a copy of the License at
#
#     http://www.apache.org/licenses/LICENSE-2.0
#
# Unless required by applicable law or agreed to in writing, software
# distributed under the License is distributed on an "AS IS" BASIS,
# WITHOUT WARRANTIES OR CONDITIONS OF ANY KIND, either express or implied.
# See the License for the specific language governing permissions and
# limitations under the License.

[Unit]
Description=containerd container runtime
Documentation=https://containerd.io
After=network.target local-fs.target

[Service]
ExecStartPre=-/sbin/modprobe overlay
ExecStart=/usr/bin/containerd

Type=notify
Delegate=yes
KillMode=process
Restart=always
RestartSec=5
# Having non-zero Limit*s causes performance problems due to accounting overhead
# in the kernel. We recommend using cgroups to do container-local accounting.
LimitNPROC=infinity
LimitCORE=infinity
LimitNOFILE=infinity
# Comment TasksMax if your systemd version does not supports it.
# Only systemd 226 and above support this version.
TasksMax=infinity
OOMScoreAdjust=-999

[Install]
WantedBy=multi-user.target
root@containerd-server:~# whereis runc
runc: /usr/sbin/runc
root@containerd-server:~# whereis containerd
containerd: /usr/bin/containerd
root@containerd-server:~# runc -v
runc version 1.1.4-0ubuntu1~22.04.1
spec: 1.0.2-dev
go: go1.18.1
libseccomp: 2.5.3
root@containerd-server:~# containerd -v
containerd github.com/containerd/containerd 1.6.12-0ubuntu1~22.04.1
#查看 containerd 默认配置
root@containerd-server:~# containerd config default#创建 containerd 配置文件
root@containerd-server:~# mkdir /etc/containerd
root@containerd-server:~# containerd config default > /etc/containerd/config.toml
root@containerd-server:~# systemctl restart containerd.service
[https://github.com/Mirantis/cri-dockerd](https://github.com/Mirantis/cri-dockerd)
https://www.cnblogs.com/tingfengdengyu/articles/17336942.html
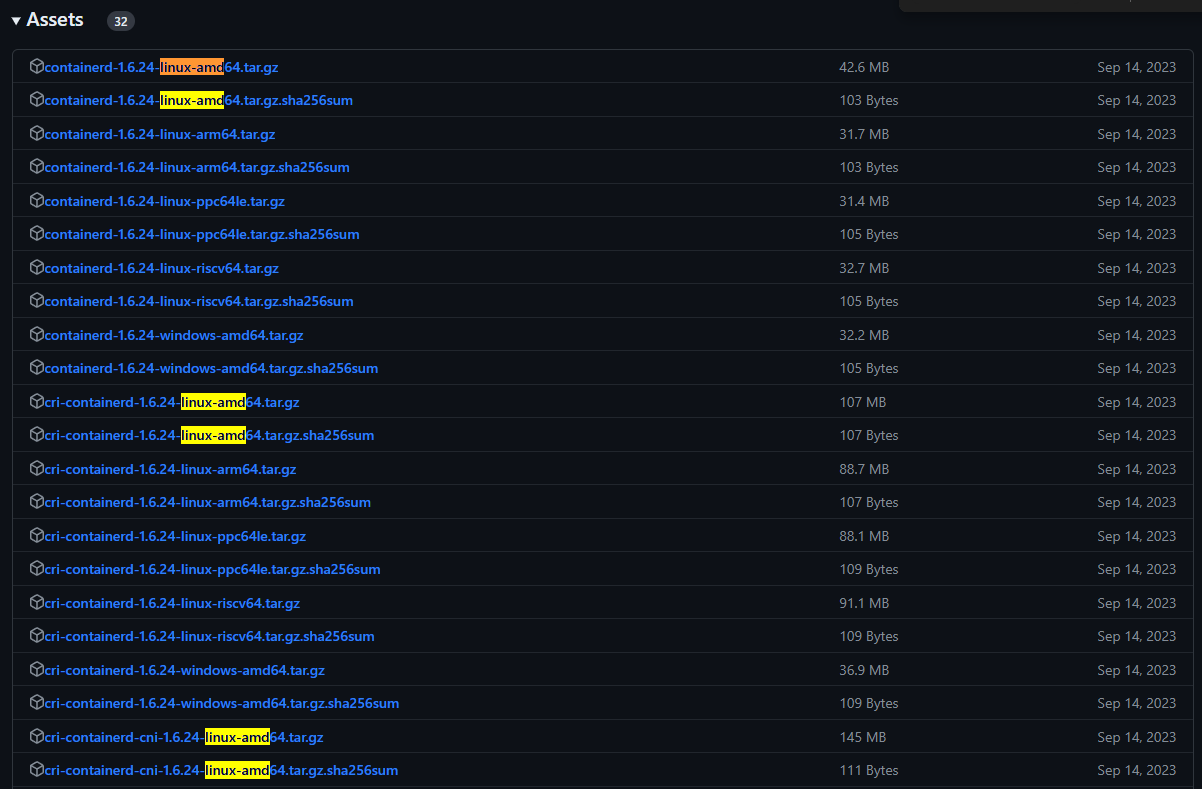
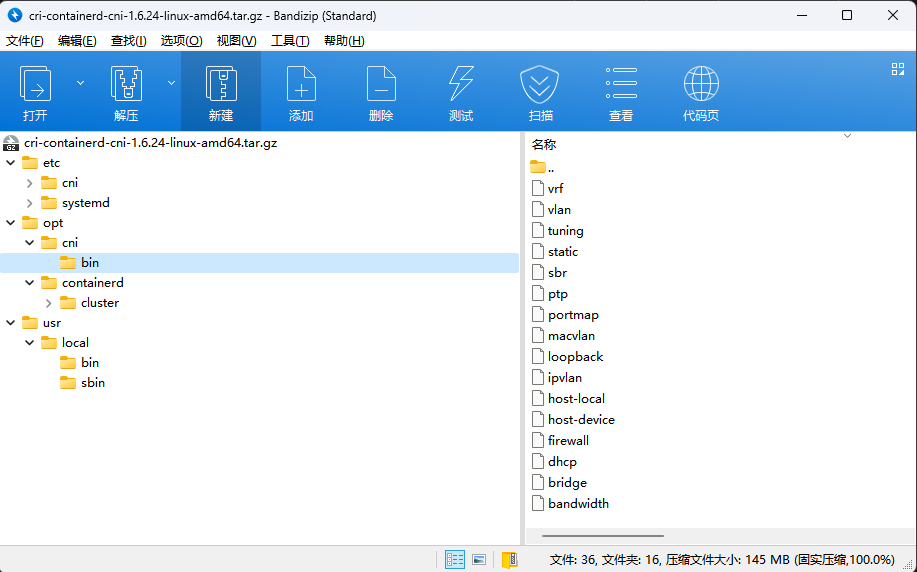
2.2、将压缩包解压到系统的各个目录中
tar -C / -zxf cri-containerd-cni-1.6.24-linux-amd64.tar.gz

root@master1:/k8s-data# ll /usr/local/bin/
total 260304
drwxr-xr-x  2 root root     4096 Sep 14 07:11 ./
drwxr-xr-x 10 root root     4096 Sep 14 07:08 ../
-rwxr-xr-x  1 root root 52621816 Sep 14 07:08 containerd*
-rwxr-xr-x  1 root root  7462912 Sep 14 07:08 containerd-shim*
-rwxr-xr-x  1 root root  9576448 Sep 14 07:08 containerd-shim-runc-v1*
-rwxr-xr-x  1 root root  9605120 Sep 14 07:08 containerd-shim-runc-v2*
-rwxr-xr-x  1 root root 23306488 Sep 14 07:08 containerd-stress*
-rwxr-xr-x  1 root root 54137463 Sep 14 07:10 crictl*
-rwxr-xr-x  1 root root 56286175 Sep 14 07:10 critest*
-rwxr-xr-x  1 root root 26232112 Sep 14 07:11 ctd-decoder*
-rwxr-xr-x 1 root root 27296312 Sep 14 07:08 ctr*#验证 containerd 执行结果
containerd -v
containerd github.com/containerd/containerd v1.6.24 61f9fd88f79f081d64d6fa3bb1a0dc71ec870523
cat > /lib/systemd/system/containerd.service << EOF
# Copyright The containerd Authors.
#
# Licensed under the Apache License, Version 2.0 (the "License");
# you may not use this file except in compliance with the License.
# You may obtain a copy of the License at
#
#     http://www.apache.org/licenses/LICENSE-2.0
#
# Unless required by applicable law or agreed to in writing, software
# distributed under the License is distributed on an "AS IS" BASIS,
# WITHOUT WARRANTIES OR CONDITIONS OF ANY KIND, either express or implied.
# See the License for the specific language governing permissions and
# limitations under the License.

[Unit]
Description=containerd container runtime
Documentation=https://containerd.io
After=network.target local-fs.target

[Service]
ExecStartPre=-/sbin/modprobe overlay
ExecStart=/usr/bin/containerd

Type=notify
Delegate=yes
KillMode=process
Restart=always
RestartSec=5
# Having non-zero Limit*s causes performance problems due to accounting overhead
# in the kernel. We recommend using cgroups to do container-local accounting.
LimitNPROC=infinity
LimitCORE=infinity
LimitNOFILE=infinity
# Comment TasksMax if your systemd version does not supports it.
# Only systemd 226 and above support this version.
TasksMax=infinity
OOMScoreAdjust=-999

[Install]
WantedBy=multi-user.target
EOF2.4 、启动containerd 服务
#运行 containerd 服务,并设置开机启动

systemctl daemon-reload
systemctl start containerd && systemctl enable containerd.service
Created symlink /etc/systemd/system/multi-user.target.wants/containerd.service → /etc/systemd                                                                             /system/containerd.service.

------------------------------------------------------------
root@master1:/k8s-data# systemctl status containerd.service
● containerd.service - containerd container runtime
     Loaded: loaded (/etc/systemd/system/containerd.service; enabled; vendor preset: enabled)
     Active: active (running) since Fri 2024-03-01 11:03:52 CST; 1min 33s ago
       Docs: https://containerd.io
   Main PID: 12483 (containerd)
      Tasks: 9
     Memory: 13.2M
        CPU: 681ms
     CGroup: /system.slice/containerd.service
             └─12483 /usr/local/bin/containerd

Mar 01 11:03:52 master1 containerd[12483]: time="2024-03-01T11:03:52.177386467+08:00" level=info msg=serving... address=/run/containerd/containerd.sock.ttrpc
Mar 01 11:03:52 master1 containerd[12483]: time="2024-03-01T11:03:52.177620799+08:00" level=info msg=serving... address=/run/containerd/containerd.sock
Mar 01 11:03:52 master1 containerd[12483]: time="2024-03-01T11:03:52.177765803+08:00" level=info msg="Start subscribing containerd event"
Mar 01 11:03:52 master1 containerd[12483]: time="2024-03-01T11:03:52.177999021+08:00" level=info msg="Start recovering state"
Mar 01 11:03:52 master1 containerd[12483]: time="2024-03-01T11:03:52.178255615+08:00" level=info msg="Start event monitor"
Mar 01 11:03:52 master1 containerd[12483]: time="2024-03-01T11:03:52.178465109+08:00" level=info msg="Start snapshots syncer"
Mar 01 11:03:52 master1 containerd[12483]: time="2024-03-01T11:03:52.178612046+08:00" level=info msg="Start cni network conf syncer for default"
Mar 01 11:03:52 master1 containerd[12483]: time="2024-03-01T11:03:52.178718637+08:00" level=info msg="Start streaming server"
Mar 01 11:03:52 master1 systemd[1]: Started containerd container runtime.
Mar 01 11:03:52 master1 containerd[12483]: time="2024-03-01T11:03:52.180878526+08:00" level=info msg="containerd successfully booted in 0.035290s"2.4、验证runc版本
#查看runc版本
runc -v
--------------------------
runc version 1.1.9
commit: v1.1.9-0-gccaecfcb
spec: 1.0.2-dev
go: go1.20.8
libseccomp: 2.5.32.5、验证CNI插件
#查看CNI插件
ls /opt/cni/bin/
bandwidth  dhcp      host-device  ipvlan    macvlan  ptp  static  vlan
bridge firewall host-local loopback portmap sbr tuning vrfcontainerd 的默认配置文件为 /etc/containerd/config.toml,我们可以通过如下所示的命令生成一个默认的配置:
mkdir -p /etc/containerd
containerd config default > /etc/containerd/config.toml2.6 、containerd 优化
对于使用 systemd 作为 init system 的 Linux 的发行版,使用 systemd 作为容器的 cgroup driver 可以确保节点在资源紧张的情况更加稳定,所以推荐将 containerd 的 cgroup driver 配置为 systemd。
修改前面生成的配置文件 /etc/containerd/config.toml,在 plugins."io.containerd.grpc.v1.cri".containerd.runtimes.runc.options 配置块下面将 SystemdCgroup 设置为 true:
[plugins."io.containerd.grpc.v1.cri".containerd.runtimes.runc]
  ...
  [plugins."io.containerd.grpc.v1.cri".containerd.runtimes.runc.options]
    SystemdCgroup = true
....然后再为镜像仓库配置一个加速器,需要在 cri 配置块下面的 registry 配置块下面进行配置 registry.mirrors:
[plugins."io.containerd.grpc.v1.cri"]
  ...
  # sandbox_image = "k8s.gcr.io/pause:3.6"
  sandbox_image = "registry.cn-hangzhou.aliyuncs.com/xxk8s/pause:3.6"
  ...
  [plugins."io.containerd.grpc.v1.cri".registry]
    [plugins."io.containerd.grpc.v1.cri".registry.mirrors]
      [plugins."io.containerd.grpc.v1.cri".registry.mirrors."docker.io"]
        endpoint = ["https://9916w1ow.mirror.aliyuncs.com"]
      [plugins."io.containerd.grpc.v1.cri".registry.mirrors."k8s.gcr.io"]
endpoint = ["https://registry.aliyuncs.com/k8sxio"]由于上面我们下载的 containerd 压缩包中包含一个 etc/systemd/system/containerd.service 的文件,这样我们就可以通过 systemd 来配置 containerd 作为守护进程运行了,现在我们就可以启动 containerd 了,直接执行下面的命令即可:
systemctl daemon-reload
systemctl restart containerd
systemctl enable containerd.service

root@node1:~# systemctl status containerd.service
● containerd.service - containerd container runtime
     Loaded: loaded (/etc/systemd/system/containerd.service; enabled; vendor preset: enabled)
     Active: active (running) since Mon 2024-03-04 16:49:48 CST; 11s ago
       Docs: https://containerd.io
    Process: 5208 ExecStartPre=/sbin/modprobe overlay (code=exited, status=0/SUCCESS)
   Main PID: 5209 (containerd)
      Tasks: 9
     Memory: 12.6M
        CPU: 117ms
     CGroup: /system.slice/containerd.service
             └─5209 /usr/local/bin/containerd

Mar 04 16:49:48 node1 containerd[5209]: time="2024-03-04T16:49:48.058205051+08:00" level=info msg=serving... address=/run/containerd/containerd.sock.ttrpc
Mar 04 16:49:48 node1 containerd[5209]: time="2024-03-04T16:49:48.058480299+08:00" level=info msg=serving... address=/run/containerd/containerd.sock
Mar 04 16:49:48 node1 containerd[5209]: time="2024-03-04T16:49:48.058656802+08:00" level=info msg="Start subscribing containerd event"
Mar 04 16:49:48 node1 containerd[5209]: time="2024-03-04T16:49:48.058883539+08:00" level=info msg="Start recovering state"
Mar 04 16:49:48 node1 containerd[5209]: time="2024-03-04T16:49:48.059128801+08:00" level=info msg="Start event monitor"
Mar 04 16:49:48 node1 containerd[5209]: time="2024-03-04T16:49:48.059277420+08:00" level=info msg="Start snapshots syncer"
Mar 04 16:49:48 node1 containerd[5209]: time="2024-03-04T16:49:48.059394571+08:00" level=info msg="Start cni network conf syncer for default"
Mar 04 16:49:48 node1 containerd[5209]: time="2024-03-04T16:49:48.059502144+08:00" level=info msg="Start streaming server"
Mar 04 16:49:48 node1 systemd[1]: Started containerd container runtime.
Mar 04 16:49:48 node1 containerd[5209]: time="2024-03-04T16:49:48.062164748+08:00" level=info msg="containerd successfully booted in 0.037756s"启动完成后就可以使用 containerd 的本地 CLI 工具 ctr 和 crictl 了,比如查看版本:
ctr version
Client:
  Version:  v1.6.24
  Revision: 61f9fd88f79f081d64d6fa3bb1a0dc71ec870523
  Go version: go1.20.8

Server:
  Version:  v1.6.24
  Revision: 61f9fd88f79f081d64d6fa3bb1a0dc71ec870523
  UUID: 2179335a-2598-4205-94df-6d8150c97c16

----------------------------------------------------
crictl version
Version:  0.1.0
RuntimeName:  containerd
RuntimeVersion:  v1.6.24
RuntimeApiVersion:  v1
https://github.com/containerd/nerdctl
https://github.com/containerd/nerdctl/releases/download/v1.7.4/nerdctl-1.7.4-linux-amd64.tar.gz
tar xfv nerdctl-1.7.4-linux-amd64.tar.gz -C /usr/bin/
nerdctl
containerd-rootless-setuptool.sh
containerd-rootless.sh


------------------------------------
root@k8s-master-1:~# nerdctl version
WARN[0000] unable to determine buildctl version: exec: "buildctl": executable file not found in $PATH
Client:
 Version:	v1.3.0
 OS/Arch:	linux/amd64
 Git commit:	c6ddd63dea9aa438fdb0587c0d3d9ae61a60523e
 buildctl:
  Version:

Server:
 containerd:
  Version:	v1.6.20
  GitCommit:	2806fc1057397dbaeefbea0e4e17bddfbd388f38
 runc:
  Version:	1.1.6
  GitCommit:	v1.1.6-0-g0f48801a
root@k8s-master-1:~#
mkdir -p /etc/nerdctl

cat > /etc/nerdctl/nerdctl.toml <<EOF
namespace = "k8s.io"
debug = false
debug_full = false
insecure_registry = true
EOF
root@master1:/k8s-data# nerdctl pull nginx
docker.io/library/nginx:latest:                                                   resolved       |++++++++++++++++++++++++++++++++++++++|
index-sha256:c26ae7472d624ba1fafd296e73cecc4f93f853088e6a9c13c0d52f6ca5865107:    exists         |++++++++++++++++++++++++++++++++++++++|
manifest-sha256:05aa73005987caaed48ea8213696b0df761ccd600d2c53fc0a1a97a180301d71: exists         |++++++++++++++++++++++++++++++++++++++|
config-sha256:e4720093a3c1381245b53a5a51b417963b3c4472d3f47fc301930a4f3b17666a:   exists         |++++++++++++++++++++++++++++++++++++++|
layer-sha256:c3ea3344e711fd7111dee02f17deebceb725ed1d0ee998f7fb472114dc1399ce:    exists         |++++++++++++++++++++++++++++++++++++++|
layer-sha256:18a869624cb60aaa916942dc71c22b194a078dcbbb9b8f54d40512eba55f70b8:    exists         |++++++++++++++++++++++++++++++++++++++|
layer-sha256:cc1bb4345a3a849289cfb3e2471c096f374423ec1ef74766137b9de546498612:    exists         |++++++++++++++++++++++++++++++++++++++|
layer-sha256:88f6f236f401ac07aa5309d8ade2b0c9d24b9f526bd4e73311bf5c1787cfd49c:    downloading    |++++++++++++++++++++++++++------------| 28.0 MiB/39.5 MiB
layer-sha256:da8fa4352481b358fc60d40ee20d92da64124d2cf405115640d45980339f47e5:    exists         |++++++++++++++++++++++++++++++++++++++|
layer-sha256:c7f80e9cdab20387cd09e3c47121ef0eb531043cf0aca1a52aab659de3ccb704:    exists         |++++++++++++++++++++++++++++++++++++++|
elapsed: 7.1 s                                                                    total:  28.0 M (3.9 MiB/s)
#nerdctl 创建 nginx 容器
nerdctl run -d -p 80:80 --name=nginx-web1 --restart=always nginx
686b2ab0ffa65e3d25a0ca4e51e0dc9f0ea31dab4548e4c380ddb089c5bee077


#删除容器
nerdctl rm 686b2ab0ffa6 -f
686b2ab0ffa6


#删除镜像
root@master1:/k8s-data# nerdctl rmi c26ae7472d62
Untagged: docker.io/library/nginx:latest@sha256:c26ae7472d624ba1fafd296e73cecc4f93f853088e6a9c13c0d52f6ca5865107
Deleted: sha256:ceb365432eec83dafc777cac5ee87737b093095035c89dd2eae01970c57b1d15
Deleted: sha256:84619992a45bb790ab8f77ff523e52fc76dadfe17e205db6a111d0f657d31d71
Deleted: sha256:3137f8f0c6412c12b46fd397866589505b4474e53580b4e62133da67bf1b2903
Deleted: sha256:7d52a4114c3602761999a4ea2f84a093c8fcc8662876acc4c3b92878b9948547
Deleted: sha256:188d128a188cafb013db48e94d9366f0be64083619f50b452cfd093e7affa260
Deleted: sha256:bcc6856722b7b251ad00728c9cd93b679c7836d5e6780b52316b56c20fd5be94
Deleted: sha256:61a7fb4dabcd05eba747fed22ff5264f82066d2bf8e16f78198f616e700f5aa7

nerdctl images
REPOSITORY    TAG       IMAGE ID        CREATED          PLATFORM       SIZE         BLOB SIZE
nginx latest c26ae7472d62 2 minutes ago linux/amd64 191.9 MiB 67.3 MiB#验证 nginx 服务
curl 192.168.29.6
-----------------
<!DOCTYPE html>
<html>
<head>
<title>Welcome to nginx!</title>
<style>
html { color-scheme: light dark; }
body { width: 35em; margin: 0 auto;
font-family: Tahoma, Verdana, Arial, sans-serif; }
</style>
</head>
<body>
<h1>Welcome to nginx!</h1>
<p>If you see this page, the nginx web server is successfully installed and
working. Further configuration is required.</p>
<p>For online documentation and support please refer to
<a href="http://nginx.org/">nginx.org</a>.<br/>
Commercial support is available at
<a href="http://nginx.com/">nginx.com</a>.</p>
<p><em>Thank you for using nginx.</em></p>
</body>
</html>
nerdctl logs -f nginx-web1
/docker-entrypoint.sh: /docker-entrypoint.d/ is not empty, will attempt to perform configuration
/docker-entrypoint.sh: Looking for shell scripts in /docker-entrypoint.d/
/docker-entrypoint.sh: Launching /docker-entrypoint.d/10-listen-on-ipv6-by-default.sh
10-listen-on-ipv6-by-default.sh: info: Getting the checksum of /etc/nginx/conf.d/default.conf
10-listen-on-ipv6-by-default.sh: info: Enabled listen on IPv6 in /etc/nginx/conf.d/default.conf
/docker-entrypoint.sh: Sourcing /docker-entrypoint.d/15-local-resolvers.envsh
/docker-entrypoint.sh: Launching /docker-entrypoint.d/20-envsubst-on-templates.sh
/docker-entrypoint.sh: Launching /docker-entrypoint.d/30-tune-worker-processes.sh
/docker-entrypoint.sh: Configuration complete; ready for start up
2024/03/01 07:39:41 [notice] 1#1: using the "epoll" event method
2024/03/01 07:39:41 [notice] 1#1: nginx/1.25.4
2024/03/01 07:39:41 [notice] 1#1: built by gcc 12.2.0 (Debian 12.2.0-14)
2024/03/01 07:39:41 [notice] 1#1: OS: Linux 5.15.0-100-generic
2024/03/01 07:39:41 [notice] 1#1: getrlimit(RLIMIT_NOFILE): 1048576:1048576
2024/03/01 07:39:41 [notice] 1#1: start worker processes
2024/03/01 07:39:41 [notice] 1#1: start worker process 30
2024/03/01 07:39:41 [notice] 1#1: start worker process 31
192.168.29.6 - - [01/Mar/2024:07:40:02 +0000] "GET / HTTP/1.1" 200 615 "-" "curl/7.81.0" "-"
192.168.29.12 - - [01/Mar/2024:07:40:32 +0000] "GET / HTTP/1.1" 200 615 "-" "Mozilla/5.0 (Windows NT 10.0; Win64; x64) AppleWebKit/537.36 (KHTML, like Gecko) Chrome/122.0.0.0 Safari/537.36" "-"
2024/03/01 07:40:33 [error] 30#30: *2 open() "/usr/share/nginx/html/favicon.ico" failed (2: No such file or directory), client: 192.168.29.12, server: localhost, request: "GET /favicon.ico HTTP/1.1", host: "192.168.29.6", referrer: "http://192.168.29.6/"
192.168.29.12 - - [01/Mar/2024:07:40:33 +0000] "GET /favicon.ico HTTP/1.1" 404 555 "http://192.168.29.6/" "Mozilla/5.0 (Windows NT 10.0; Win64; x64) AppleWebKit/537.36 (KHTML, like Gecko) Chrome/122.0.0.0 Safari/537.36" "-"
nerdctl ps -a
CONTAINER ID    IMAGE                             COMMAND                   CREATED               STATUS    PORTS                 NAMES
686b2ab0ffa6 docker.io/library/nginx:latest "/docker-entrypoint.…" About a minute ago Up 0.0.0.0:80->80/tcp nginx-web1二、使用 kubeadm 部署 Kubernetes
上面的相关环境配置也完成了,现在我们就可以来安装 Kubeadm 了
apt-get update && apt-get install -y apt-transport-https

curl https://mirrors.aliyun.com/kubernetes/apt/doc/apt-key.gpg | apt-key add -;

cat <<EOF >/etc/apt/sources.list.d/kubernetes.list
deb https://mirrors.aliyun.com/kubernetes/apt/ kubernetes-xenial main
EOF

apt-get update && apt-cache madison kubeadm
apt-get install -y kubeadm=1.22.2-00 kubectl=1.22.2-00 kubelet=1.22.2-00** kubernetes-xenial/**" 表示一个名为 "xenial" 的仓库,该仓库包含了适用于 Ubuntu 16.04 (Xenial Xerus) 的 Kubernetes 软件包。类似地,"kubernetes-trusty/" 则可能包含了适用于 Ubuntu 14.04 (Trusty Tahr) 的 Kubernetes 软件包。
2.2 初始化集群
当我们执行 kubelet --help 命令的时候可以看到原来大部分命令行参数都被 DEPRECATED了,这是因为官方推荐我们使用 --config 来指定配置文件,在配置文件中指定原来这些参数的配置,可以通过官方文档 Set Kubelet parameters via a config file 了解更多相关信息,这样 Kubernetes 就可以支持动态 Kubelet 配置(Dynamic Kubelet Configuration)了,参考 Reconfigure a Node’s Kubelet in a Live Cluster。
然后我们可以通过下面的命令在 master 节点上输出集群初始化默认使用的配置:
kubeadm config print init-defaults --component-configs KubeletConfiguration > kubeadm.yaml然后根据我们自己的需求修改配置,比如修改 imageRepository 指定集群初始化时拉取 Kubernetes 所需镜像的地址,kube-proxy 的模式为 ipvs,另外需要注意的是我们这里是准备安装 flannel 网络插件的,需要将 networking.podSubnet 设置为 10.244.0.0/16:
# kubeadm.yaml
apiVersion: kubeadm.k8s.io/v1beta3
bootstrapTokens:
  - groups:
      - system:bootstrappers:kubeadm:default-node-token
    token: abcdef.0123456789abcdef
    ttl: 24h0m0s
    usages:
      - signing
      - authentication
kind: InitConfiguration
localAPIEndpoint:
  advertiseAddress: 192.168.29.6 # 指定master节点内网IP
  bindPort: 6443
nodeRegistration:
  criSocket: /run/containerd/containerd.sock # 使用 containerd的Unix socket 地址
  imagePullPolicy: IfNotPresent
  name: master1
  taints: # 给master添加污点,master节点不能调度应用
    - effect: "NoSchedule"
      key: "node-role.kubernetes.io/master"

---
apiVersion: kubeproxy.config.k8s.io/v1alpha1
kind: KubeProxyConfiguration
mode: ipvs # kube-proxy 模式

---
apiServer:
  timeoutForControlPlane: 4m0s
apiVersion: kubeadm.k8s.io/v1beta3
certificatesDir: /etc/kubernetes/pki
clusterName: kubernetes
controllerManager: {}
dns: {}
etcd:
  local:
    dataDir: /var/lib/etcd
imageRepository: registry.cn-hangzhou.aliyuncs.com/google_containers #指定镜像仓库
kind: ClusterConfiguration
kubernetesVersion: v1.22.2 #指定K8S版本
networking:
  dnsDomain: cluster.local
  serviceSubnet: 10.96.0.0/12
  podSubnet: 10.244.0.0/16 # 指定 pod 子网
scheduler: {}

---
apiVersion: kubelet.config.k8s.io/v1beta1
authentication:
  anonymous:
    enabled: false
  webhook:
    cacheTTL: 0s
    enabled: true
  x509:
    clientCAFile: /etc/kubernetes/pki/ca.crt
authorization:
  mode: Webhook
  webhook:
    cacheAuthorizedTTL: 0s
    cacheUnauthorizedTTL: 0s
clusterDNS:
  - 10.96.0.10
clusterDomain: cluster.local
cpuManagerReconcilePeriod: 0s
evictionPressureTransitionPeriod: 0s
fileCheckFrequency: 0s
healthzBindAddress: 127.0.0.1
healthzPort: 10248
httpCheckFrequency: 0s
imageMinimumGCAge: 0s
kind: KubeletConfiguration
logging: {}
memorySwap: {}
nodeStatusReportFrequency: 0s
nodeStatusUpdateFrequency: 0s
rotateCertificates: true
runtimeRequestTimeout: 0s
shutdownGracePeriod: 0s
shutdownGracePeriodCriticalPods: 0s
staticPodPath: /etc/kubernetes/manifests
streamingConnectionIdleTimeout: 0s
syncFrequency: 0s
volumeStatsAggPeriod: 0s对于上面的资源清单的文档比较杂,要想完整了解上面的资源对象对应的属性,可以查看对应的 godoc 文档,地址:https://godoc.org/k8s.io/kubernetes/cmd/kubeadm/app/apis/kubeadm/v1beta3。
在开始初始化集群之前可以使用 kubeadm config images pull --config kubeadm.yaml 预先在各个服务器节点上拉取所 k8s 需要的容器镜像。
配置文件准备好过后,可以使用如下命令先将相关镜像 pull 下面:
kubeadm config images pull --image-repository="registry.cn-hangzhou.aliyuncs.com/google_containers" --kubernetes-version=v1.22.2

[config/images] Pulled registry.cn-hangzhou.aliyuncs.com/google_containers/kube-apiserver:v1.22.2
[config/images] Pulled registry.cn-hangzhou.aliyuncs.com/google_containers/kube-controller-manager:v1.22.2
[config/images] Pulled registry.cn-hangzhou.aliyuncs.com/google_containers/kube-scheduler:v1.22.2
[config/images] Pulled registry.cn-hangzhou.aliyuncs.com/google_containers/kube-proxy:v1.22.2
[config/images] Pulled registry.cn-hangzhou.aliyuncs.com/google_containers/pause:3.5
[config/images] Pulled registry.cn-hangzhou.aliyuncs.com/google_containers/etcd:3.5.0-0
[config/images] Pulled registry.cn-hangzhou.aliyuncs.com/google_containers/coredns:v1.8.4

#或者
kubeadm config images pull --config kubeadm.yaml然后就可以使用上面的配置文件在 master 节点上进行初始化:
kubeadm init --config kubeadm.yaml

root@master1:/k8s-data# kubeadm init --config kubeadm.yaml
[init] Using Kubernetes version: v1.22.2
[preflight] Running pre-flight checks
[preflight] Pulling images required for setting up a Kubernetes cluster
[preflight] This might take a minute or two, depending on the speed of your internet connection
[preflight] You can also perform this action in beforehand using 'kubeadm config images pull'
[certs] Using certificateDir folder "/etc/kubernetes/pki"
[certs] Generating "ca" certificate and key
[certs] Generating "apiserver" certificate and key
[certs] apiserver serving cert is signed for DNS names [kubernetes kubernetes.default kubernetes.default.svc kubernetes.default.                                 svc.cluster.local master1] and IPs [10.96.0.1 192.168.29.6]
[certs] Generating "apiserver-kubelet-client" certificate and key
[certs] Generating "front-proxy-ca" certificate and key
[certs] Generating "front-proxy-client" certificate and key
[certs] Generating "etcd/ca" certificate and key
[certs] Generating "etcd/server" certificate and key
[certs] etcd/server serving cert is signed for DNS names [localhost master1] and IPs [192.168.29.6 127.0.0.1 ::1]
[certs] Generating "etcd/peer" certificate and key
[certs] etcd/peer serving cert is signed for DNS names [localhost master1] and IPs [192.168.29.6 127.0.0.1 ::1]
[certs] Generating "etcd/healthcheck-client" certificate and key
[certs] Generating "apiserver-etcd-client" certificate and key
[certs] Generating "sa" key and public key
[kubeconfig] Using kubeconfig folder "/etc/kubernetes"
[kubeconfig] Writing "admin.conf" kubeconfig file
[kubeconfig] Writing "kubelet.conf" kubeconfig file
[kubeconfig] Writing "controller-manager.conf" kubeconfig file
[kubeconfig] Writing "scheduler.conf" kubeconfig file
[kubelet-start] Writing kubelet environment file with flags to file "/var/lib/kubelet/kubeadm-flags.env"
[kubelet-start] Writing kubelet configuration to file "/var/lib/kubelet/config.yaml"
[kubelet-start] Starting the kubelet
[control-plane] Using manifest folder "/etc/kubernetes/manifests"
[control-plane] Creating static Pod manifest for "kube-apiserver"
[control-plane] Creating static Pod manifest for "kube-controller-manager"
[control-plane] Creating static Pod manifest for "kube-scheduler"
[etcd] Creating static Pod manifest for local etcd in "/etc/kubernetes/manifests"
[wait-control-plane] Waiting for the kubelet to boot up the control plane as static Pods from directory "/etc/kubernetes/manifests". This can take up to 4m0s
[apiclient] All control plane components are healthy after 15.004519 seconds
[upload-config] Storing the configuration used in ConfigMap "kubeadm-config" in the "kube-system" Namespace
[kubelet] Creating a ConfigMap "kubelet-config-1.22" in namespace kube-system with the configuration for the kubelets in the cluster
[upload-certs] Skipping phase. Please see --upload-certs
[mark-control-plane] Marking the node master1 as control-plane by adding the labels: [node-role.kubernetes.io/master(deprecated) node-role.kubernetes.io/control-plane node.kubernetes.io/exclude-from-external-load-balancers]
[mark-control-plane] Marking the node master1 as control-plane by adding the taints [node-role.kubernetes.io/master:NoSchedule]
[bootstrap-token] Using token: abcdef.0123456789abcdef
[bootstrap-token] Configuring bootstrap tokens, cluster-info ConfigMap, RBAC Roles
[bootstrap-token] configured RBAC rules to allow Node Bootstrap tokens to get nodes
[bootstrap-token] configured RBAC rules to allow Node Bootstrap tokens to post CSRs in order for nodes to get long term certificate credentials
[bootstrap-token] configured RBAC rules to allow the csrapprover controller automatically approve CSRs from a Node Bootstrap Token
[bootstrap-token] configured RBAC rules to allow certificate rotation for all node client certificates in the cluster
[bootstrap-token] Creating the "cluster-info" ConfigMap in the "kube-public" namespace
[kubelet-finalize] Updating "/etc/kubernetes/kubelet.conf" to point to a rotatable kubelet client certificate and key
[addons] Applied essential addon: CoreDNS
[addons] Applied essential addon: kube-proxy

Your Kubernetes control-plane has initialized successfully!

To start using your cluster, you need to run the following as a regular user:

  mkdir -p $HOME/.kube
  sudo cp -i /etc/kubernetes/admin.conf $HOME/.kube/config
  sudo chown $(id -u):$(id -g) $HOME/.kube/config

Alternatively, if you are the root user, you can run:

  export KUBECONFIG=/etc/kubernetes/admin.conf

You should now deploy a pod network to the cluster.
Run "kubectl apply -f [podnetwork].yaml" with one of the options listed at:
  https://kubernetes.io/docs/concepts/cluster-administration/addons/

Then you can join any number of worker nodes by running the following on each as root:

kubeadm join 192.168.29.6:6443 --token abcdef.0123456789abcdef \
--discovery-token-ca-cert-hash sha256:4f2d432f75baf1737c8b0127681f62b6fc32d014f01f5175fabc4a62c766d547## 默认有效期24小时,若想久一些可以结合–ttl参数,设为0则用不过期
root@master1:~# kubeadm token create --print-join-command
kubeadm join 192.168.29.6:6443 --token m2catr.8abhdpznbtbsoywa --discovery-token-ca-cert-hash sha256:4f2d432f75baf1737c8b0127681f62b6fc32d014f01f5175fabc4a62c766d547根据安装提示拷贝 kubeconfig 文件:
mkdir -p $HOME/.kube
sudo cp -i /etc/kubernetes/admin.conf $HOME/.kube/config
sudo chown $(id -u):$(id -g) $HOME/.kube/config然后可以使用 kubectl 命令查看 master 节点已经初始化成功了:
root@master1:~# kubectl get nodes
NAME      STATUS   ROLES                  AGE     VERSION
master1   Ready    control-plane,master   2d23h   v1.22.2
node1     Ready    <none>                 62s     v1.22.2
node2     Ready    <none>                 58s     v1.22.2
root@node1:~# kubeadm join 192.168.29.6:6443 --token m2catr.8abhdpznbtbsoywa --discovery-token-ca-cert-hash sha256:4f2d432f75baf1737c8b0127681f62b6fc32d014f01f5175fabc4a62c766d547
[preflight] Running pre-flight checks
[preflight] Reading configuration from the cluster...
[preflight] FYI: You can look at this config file with 'kubectl -n kube-system get cm kubeadm-config -o yaml'
[kubelet-start] Writing kubelet configuration to file "/var/lib/kubelet/config.yaml"
[kubelet-start] Writing kubelet environment file with flags to file "/var/lib/kubelet/kubeadm-flags.env"
[kubelet-start] Starting the kubelet
[kubelet-start] Waiting for the kubelet to perform the TLS Bootstrap...

This node has joined the cluster:
* Certificate signing request was sent to apiserver and a response was received.
* The Kubelet was informed of the new secure connection details.

Run 'kubectl get nodes' on the control-plane to see this node join the cluster.root@node2:~# kubeadm join 192.168.29.6:6443 --token m2catr.8abhdpznbtbsoywa --discovery-token-ca-cert-hash sha256:4f2d432f75baf1737c8b0127681f62b6fc32d014f01f5175fabc4a62c766d547
[preflight] Running pre-flight checks
[preflight] Reading configuration from the cluster...
[preflight] FYI: You can look at this config file with 'kubectl -n kube-system get cm kubeadm-config -o yaml'
[kubelet-start] Writing kubelet configuration to file "/var/lib/kubelet/config.yaml"
[kubelet-start] Writing kubelet environment file with flags to file "/var/lib/kubelet/kubeadm-flags.env"
[kubelet-start] Starting the kubelet
[kubelet-start] Waiting for the kubelet to perform the TLS Bootstrap...
This node has joined the cluster:
* Certificate signing request was sent to apiserver and a response was received.
* The Kubelet was informed of the new secure connection details.
Run 'kubectl get nodes' on the control-plane to see this node join the cluster.
kubeadm init phase upload-certs --upload-certs
这个时候其实集群还不能正常使用,因为还没有安装网络插件,接下来安装网络插件,可以在文档 https://kubernetes.io/docs/setup/production-environment/tools/kubeadm/create-cluster-kubeadm/ 中选择我们自己的网络插件,这里我们安装 flannel:
wget https://raw.githubusercontent.com/coreos/flannel/master/Documentation/kube-flannel.yml
# 如果有节点是多网卡,则需要在资源清单文件中指定内网网卡
# 搜索到名为 kube-flannel-ds 的 DaemonSet,在kube-flannel容器下面


vi kube-flannel.yml
......
containers:
- name: kube-flannel
  image: quay.io/coreos/flannel:v0.15.0
  command:
  - /opt/bin/flanneld
  args:
  - --ip-masq
  - --kube-subnet-mgr
  - --iface=eth0  # 如果是多网卡的话,指定内网网卡的名称
......

kubectl apply -f kube-flannel.yml # 安装 flannel 网络插件---
kind: Namespace
apiVersion: v1
metadata:
name: kube-flannel
labels:
k8s-app: flannel
pod-security.kubernetes.io/enforce: privileged
---
kind: ClusterRole
apiVersion: rbac.authorization.k8s.io/v1
metadata:
labels:
k8s-app: flannel
name: flannel
rules:
- apiGroups:
- ""
resources:
- pods
verbs:
- get
- apiGroups:
- ""
resources:
- nodes
verbs:
- get
- list
- watch
- apiGroups:
- ""
resources:
- nodes/status
verbs:
- patch
- apiGroups:
- networking.k8s.io
resources:
- clustercidrs
verbs:
- list
- watch
---
kind: ClusterRoleBinding
apiVersion: rbac.authorization.k8s.io/v1
metadata:
labels:
k8s-app: flannel
name: flannel
roleRef:
apiGroup: rbac.authorization.k8s.io
kind: ClusterRole
name: flannel
subjects:
- kind: ServiceAccount
name: flannel
namespace: kube-flannel
---
apiVersion: v1
kind: ServiceAccount
metadata:
labels:
k8s-app: flannel
name: flannel
namespace: kube-flannel
---
kind: ConfigMap
apiVersion: v1
metadata:
name: kube-flannel-cfg
namespace: kube-flannel
labels:
tier: node
k8s-app: flannel
app: flannel
data:
cni-conf.json: |
{
"name": "cbr0",
"cniVersion": "0.3.1",
"plugins": [
{
"type": "flannel",
"delegate": {
"hairpinMode": true,
"isDefaultGateway": true
}
},
{
"type": "portmap",
"capabilities": {
"portMappings": true
}
}
]
}
net-conf.json: |
{
"Network": "10.244.0.0/16",
"Backend": {
"Type": "vxlan"
"Port": 8997
}
}
---
apiVersion: apps/v1
kind: DaemonSet
metadata:
name: kube-flannel-ds
namespace: kube-flannel
labels:
tier: node
app: flannel
k8s-app: flannel
spec:
selector:
matchLabels:
app: flannel
template:
metadata:
labels:
tier: node
app: flannel
spec:
affinity:
nodeAffinity:
requiredDuringSchedulingIgnoredDuringExecution:
nodeSelectorTerms:
- matchExpressions:
- key: kubernetes.io/os
operator: In
values:
- linux
hostNetwork: true
priorityClassName: system-node-critical
tolerations:
- operator: Exists
effect: NoSchedule
serviceAccountName: flannel
initContainers:
- name: install-cni-plugin
image: registry.cn-hangzhou.aliyuncs.com/xxk8s/flannel-cni-plugin:v1.4.0-flannel1
command:
- cp
args:
- -f
- /flannel
- /opt/cni/bin/flannel
volumeMounts:
- name: cni-plugin
mountPath: /opt/cni/bin
- name: install-cni
image: registry.cn-hangzhou.aliyuncs.com/xxk8s/flannel:v0.24.2
command:
- cp
args:
- -f
- /etc/kube-flannel/cni-conf.json
- /etc/cni/net.d/10-flannel.conflist
volumeMounts:
- name: cni
mountPath: /etc/cni/net.d
- name: flannel-cfg
mountPath: /etc/kube-flannel/
containers:
- name: kube-flannel
image: registry.cn-hangzhou.aliyuncs.com/xxk8s/flannel:v0.24.2
command:
- /opt/bin/flanneld
args:
- --ip-masq
- --kube-subnet-mgr
- --iface=ens18
resources:
requests:
cpu: "100m"
memory: "50Mi"
securityContext:
privileged: false
capabilities:
add: ["NET_ADMIN", "NET_RAW"]
env:
- name: POD_NAME
valueFrom:
fieldRef:
fieldPath: metadata.name
- name: POD_NAMESPACE
valueFrom:
fieldRef:
fieldPath: metadata.namespace
- name: EVENT_QUEUE_DEPTH
value: "5000"
volumeMounts:
- name: run
mountPath: /run/flannel
- name: flannel-cfg
mountPath: /etc/kube-flannel/
- name: xtables-lock
mountPath: /run/xtables.lock
volumes:
- name: run
hostPath:
path: /run/flannel
- name: cni-plugin
hostPath:
path: /opt/cni/bin
- name: cni
hostPath:
path: /etc/cni/net.d
- name: flannel-cfg
configMap:
name: kube-flannel-cfg
- name: xtables-lock
hostPath:
path: /run/xtables.lock
type: FileOrCreateroot@master1:~# kubectl apply -f /flannel.yml
namespace/kube-flannel created
clusterrole.rbac.authorization.k8s.io/flannel created
clusterrolebinding.rbac.authorization.k8s.io/flannel created
serviceaccount/flannel created
configmap/kube-flannel-cfg created
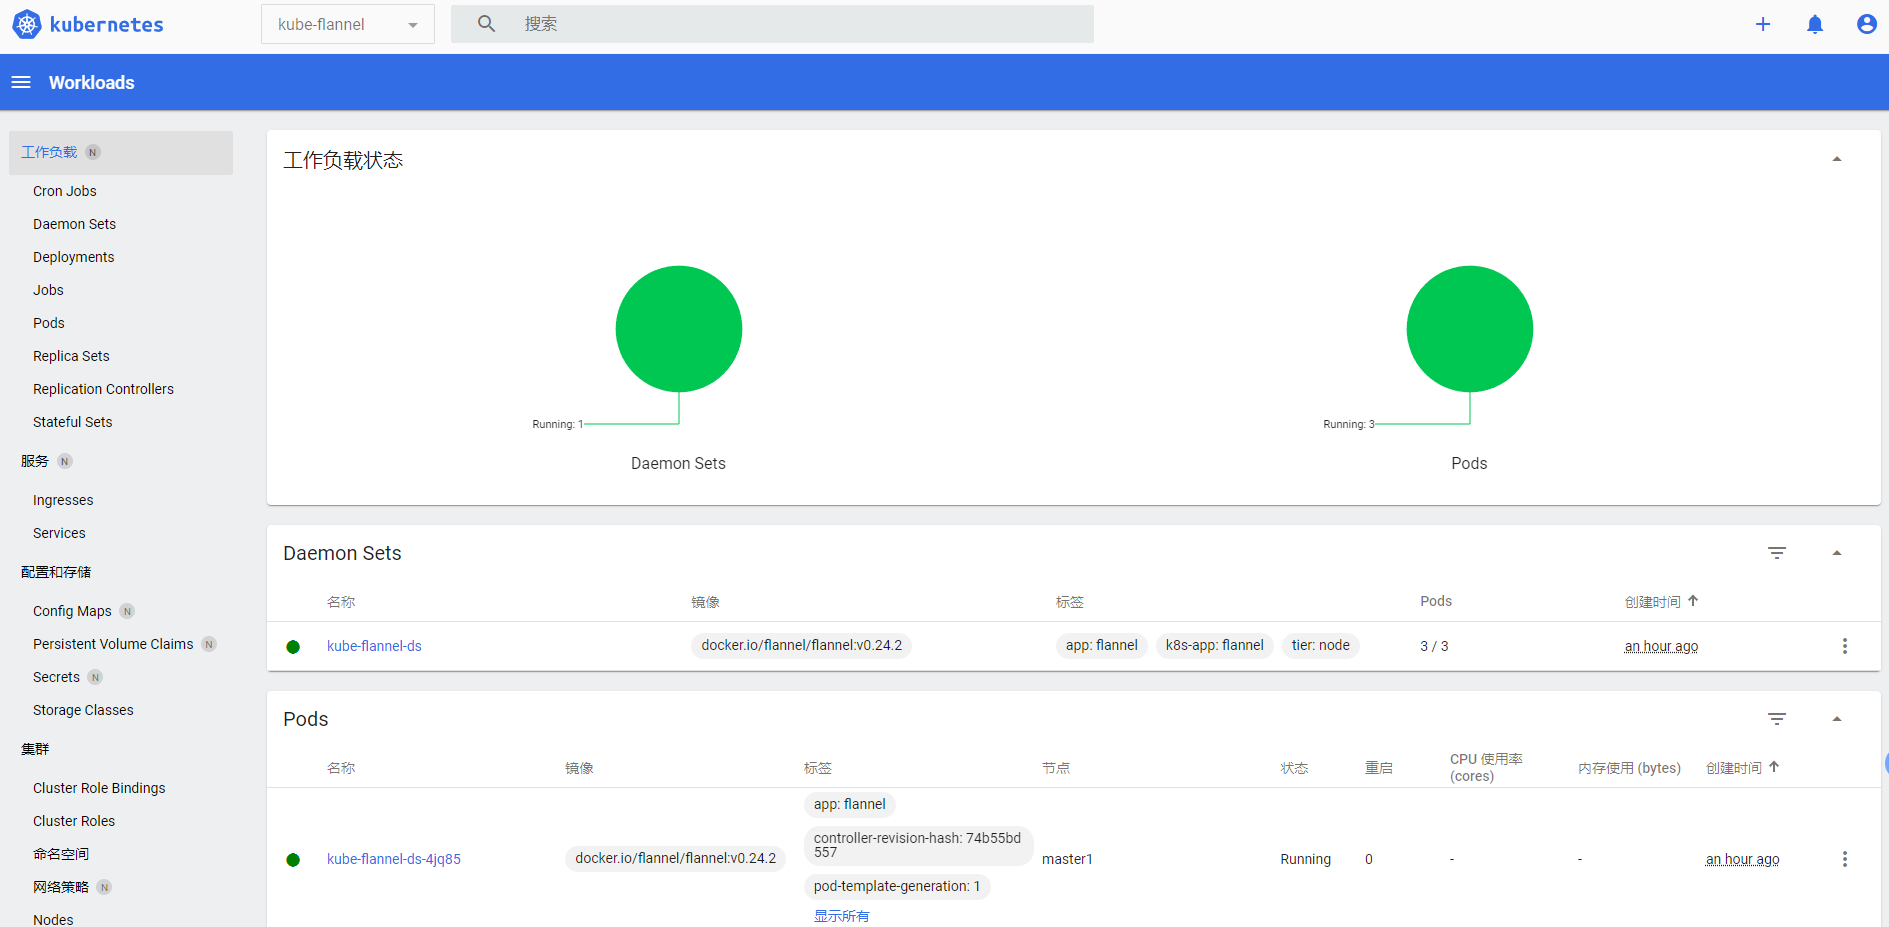
daemonset.apps/kube-flannel-ds createdecho "source <(kubectl completion bash)" >> /etc/profile.d/k8s.sh
source /etc/profile.d/k8s.sh隔一会儿查看 Pod 运行状态:
root@master1:~# kubectl get pod -n kube-flannel
NAME                    READY   STATUS    RESTARTS   AGE
kube-flannel-ds-4jq85   1/1     Running   0          7m27s
kube-flannel-ds-bskm9   1/1     Running   0          7m27s
kube-flannel-ds-pg5d5 1/1 Running 0 7m27s当我们部署完网络插件后执行 ifconfig 命令,正常会看到新增的cni0与 flannel1这两个虚拟设备,但是如果没有看到 cni0这个设备也不用太担心,我们可以观察 /var/lib/cni目录是否存在,如果不存在并不是说部署有问题,而是该节点上暂时还没有应用运行,我们只需要在该节点上运行一个 Pod 就可以看到该目录会被创建,并且 cni0设备也会被创建出来。
五、Dashboard
v1.22.2 版本的集群需要安装最新的 2.0+ 版本的 Dashboard:
# 推荐使用下面这种方式
wget https://raw.githubusercontent.com/kubernetes/dashboard/v2.3.1/aio/deploy/recommended.yamlvi recommended.yaml
# 修改Service为NodePort类型
......
kind: Service
apiVersion: v1
metadata:
labels:
k8s-app: kubernetes-dashboard
name: kubernetes-dashboard
namespace: kubernetes-dashboard
spec:
ports:
- port: 443
targetPort: 8443
selector:
k8s-app: kubernetes-dashboard
type: NodePort # 加上type=NodePort变成NodePort类型的服务
......# Copyright 2017 The Kubernetes Authors.
#
# Licensed under the Apache License, Version 2.0 (the "License");
# you may not use this file except in compliance with the License.
# You may obtain a copy of the License at
#
# http://www.apache.org/licenses/LICENSE-2.0
#
# Unless required by applicable law or agreed to in writing, software
# distributed under the License is distributed on an "AS IS" BASIS,
# WITHOUT WARRANTIES OR CONDITIONS OF ANY KIND, either express or implied.
# See the License for the specific language governing permissions and
# limitations under the License.
apiVersion: v1
kind: Namespace
metadata:
name: kubernetes-dashboard
---
apiVersion: v1
kind: ServiceAccount
metadata:
labels:
k8s-app: kubernetes-dashboard
name: kubernetes-dashboard
namespace: kubernetes-dashboard
---
kind: Service
apiVersion: v1
metadata:
labels:
k8s-app: kubernetes-dashboard
name: kubernetes-dashboard
namespace: kubernetes-dashboard
spec:
ports:
- port: 443
targetPort: 8443
nodePort: 30036
selector:
k8s-app: kubernetes-dashboard
type: NodePort
---
apiVersion: v1
kind: Secret
metadata:
labels:
k8s-app: kubernetes-dashboard
name: kubernetes-dashboard-certs
namespace: kubernetes-dashboard
type: Opaque
---
apiVersion: v1
kind: Secret
metadata:
labels:
k8s-app: kubernetes-dashboard
name: kubernetes-dashboard-csrf
namespace: kubernetes-dashboard
type: Opaque
data:
csrf: ""
---
apiVersion: v1
kind: Secret
metadata:
labels:
k8s-app: kubernetes-dashboard
name: kubernetes-dashboard-key-holder
namespace: kubernetes-dashboard
type: Opaque
---
kind: ConfigMap
apiVersion: v1
metadata:
labels:
k8s-app: kubernetes-dashboard
name: kubernetes-dashboard-settings
namespace: kubernetes-dashboard
---
kind: Role
apiVersion: rbac.authorization.k8s.io/v1
metadata:
labels:
k8s-app: kubernetes-dashboard
name: kubernetes-dashboard
namespace: kubernetes-dashboard
rules:
# Allow Dashboard to get, update and delete Dashboard exclusive secrets.
- apiGroups: [""]
resources: ["secrets"]
resourceNames: ["kubernetes-dashboard-key-holder", "kubernetes-dashboard-certs", "kubernetes-dashboard-csrf"]
verbs: ["get", "update", "delete"]
# Allow Dashboard to get and update 'kubernetes-dashboard-settings' config map.
- apiGroups: [""]
resources: ["configmaps"]
resourceNames: ["kubernetes-dashboard-settings"]
verbs: ["get", "update"]
# Allow Dashboard to get metrics.
- apiGroups: [""]
resources: ["services"]
resourceNames: ["heapster", "dashboard-metrics-scraper"]
verbs: ["proxy"]
- apiGroups: [""]
resources: ["services/proxy"]
resourceNames: ["heapster", "http:heapster:", "https:heapster:", "dashboard-metrics-scraper", "http:dashboard-metrics-scraper"]
verbs: ["get"]
---
kind: ClusterRole
apiVersion: rbac.authorization.k8s.io/v1
metadata:
labels:
k8s-app: kubernetes-dashboard
name: kubernetes-dashboard
rules:
# Allow Metrics Scraper to get metrics from the Metrics server
- apiGroups: ["metrics.k8s.io"]
resources: ["pods", "nodes"]
verbs: ["get", "list", "watch"]
---
apiVersion: rbac.authorization.k8s.io/v1
kind: RoleBinding
metadata:
labels:
k8s-app: kubernetes-dashboard
name: kubernetes-dashboard
namespace: kubernetes-dashboard
roleRef:
apiGroup: rbac.authorization.k8s.io
kind: Role
name: kubernetes-dashboard
subjects:
- kind: ServiceAccount
name: kubernetes-dashboard
namespace: kubernetes-dashboard
---
apiVersion: rbac.authorization.k8s.io/v1
kind: ClusterRoleBinding
metadata:
name: kubernetes-dashboard
roleRef:
apiGroup: rbac.authorization.k8s.io
kind: ClusterRole
name: kubernetes-dashboard
subjects:
- kind: ServiceAccount
name: kubernetes-dashboard
namespace: kubernetes-dashboard
---
kind: Deployment
apiVersion: apps/v1
metadata:
labels:
k8s-app: kubernetes-dashboard
name: kubernetes-dashboard
namespace: kubernetes-dashboard
spec:
replicas: 1
revisionHistoryLimit: 10
selector:
matchLabels:
k8s-app: kubernetes-dashboard
template:
metadata:
labels:
k8s-app: kubernetes-dashboard
spec:
containers:
- name: kubernetes-dashboard
image: registry.cn-hangzhou.aliyuncs.com/xxk8s/dashboard:v2.3.1
imagePullPolicy: Always
ports:
- containerPort: 8443
protocol: TCP
args:
- --auto-generate-certificates
- --namespace=kubernetes-dashboard
# Uncomment the following line to manually specify Kubernetes API server Host
# If not specified, Dashboard will attempt to auto discover the API server and connect
# to it. Uncomment only if the default does not work.
# - --apiserver-host=http://my-address:port
volumeMounts:
- name: kubernetes-dashboard-certs
mountPath: /certs
# Create on-disk volume to store exec logs
- mountPath: /tmp
name: tmp-volume
livenessProbe:
httpGet:
scheme: HTTPS
path: /
port: 8443
initialDelaySeconds: 30
timeoutSeconds: 30
securityContext:
allowPrivilegeEscalation: false
readOnlyRootFilesystem: true
runAsUser: 1001
runAsGroup: 2001
volumes:
- name: kubernetes-dashboard-certs
secret:
secretName: kubernetes-dashboard-certs
- name: tmp-volume
emptyDir: {}
serviceAccountName: kubernetes-dashboard
nodeSelector:
"kubernetes.io/os": linux
# Comment the following tolerations if Dashboard must not be deployed on master
tolerations:
- key: node-role.kubernetes.io/master
effect: NoSchedule
---
kind: Service
apiVersion: v1
metadata:
labels:
k8s-app: dashboard-metrics-scraper
name: dashboard-metrics-scraper
namespace: kubernetes-dashboard
spec:
ports:
- port: 8000
targetPort: 8000
selector:
k8s-app: dashboard-metrics-scraper
---
kind: Deployment
apiVersion: apps/v1
metadata:
labels:
k8s-app: dashboard-metrics-scraper
name: dashboard-metrics-scraper
namespace: kubernetes-dashboard
spec:
replicas: 1
revisionHistoryLimit: 10
selector:
matchLabels:
k8s-app: dashboard-metrics-scraper
template:
metadata:
labels:
k8s-app: dashboard-metrics-scraper
annotations:
seccomp.security.alpha.kubernetes.io/pod: 'runtime/default'
spec:
containers:
- name: dashboard-metrics-scraper
image: registry.cn-hangzhou.aliyuncs.com/xxk8s/metrics-scraper:v1.0.6
ports:
- containerPort: 8000
protocol: TCP
livenessProbe:
httpGet:
scheme: HTTP
path: /
port: 8000
initialDelaySeconds: 30
timeoutSeconds: 30
volumeMounts:
- mountPath: /tmp
name: tmp-volume
securityContext:
allowPrivilegeEscalation: false
readOnlyRootFilesystem: true
runAsUser: 1001
runAsGroup: 2001
serviceAccountName: kubernetes-dashboard
nodeSelector:
"kubernetes.io/os": linux
# Comment the following tolerations if Dashboard must not be deployed on master
tolerations:
- key: node-role.kubernetes.io/master
effect: NoSchedule
volumes:
- name: tmp-volume
emptyDir: {}在 YAML 文件中可以看到新版本 Dashboard 集成了一个 metrics-scraper 的组件,可以通过 Kubernetes 的 Metrics API 收集一些基础资源的监控信息,并在 web 页面上展示,所以要想在页面上展示监控信息就需要提供 Metrics API,比如安装 Metrics Server。
kubectl apply -f recommended.yaml新版本的 Dashboard 会被默认安装在 kubernetes-dashboard 这个命名空间下面:
root@master1:/k8s-data/system-yaml# kubectl get pods -n kubernetes-dashboard -o wide
NAME                                         READY   STATUS    RESTARTS   AGE     IP          NODE    NOMINATED NODE   READINESS GATES
dashboard-metrics-scraper-856586f554-xtzm9   1/1     Running   0          2m43s   10.88.0.2   node1   <none>           <none>
kubernetes-dashboard-67484c44f6-q6rwd 1/1 Running 0 2m43s 10.88.0.2 node2 <none> <none>我们仔细看可以发现上面的 Pod 分配的 IP 段是 10.88.xx.xx,包括前面自动安装的 CoreDNS 也是如此,我们前面不是配置的 podSubnet 为 10.244.0.0/16 吗?我们先去查看下 CNI 的配置文件:
root@master1:/k8s-data/system-yaml# ls -la /etc/cni/net.d/
total 20
drwxr-xr-x 2 root root 4096 Mar  4 20:20 .
drwxr-xr-x 3 root root 4096 Sep 14 07:09 ..
-rw-r--r-- 1 root root  604 Sep 14 07:09 10-containerd-net.conflist
-rw-r--r-- 1 root root  292 Mar  4 20:20 10-flannel.conflist
-rw-r--r-- 1 root root 860 Mar 1 15:39 nerdctl-bridge.conflist可以看到里面包含两个配置,一个是 10-containerd-net.conflist,另外一个是我们上面创建的 Flannel 网络插件生成的配置,我们的需求肯定是想使用 Flannel 的这个配置,我们可以查看下 containerd 这个自带的 cni 插件配置:
{
  "cniVersion": "1.0.0",
  "name": "containerd-net",
  "plugins": [
    {
      "type": "bridge",
      "bridge": "cni0",
      "isGateway": true,
      "ipMasq": true,
      "promiscMode": true,
      "ipam": {
        "type": "host-local",
        "ranges": [
          [{
            "subnet": "10.88.0.0/16"
          }],
          [{
            "subnet": "2001:4860:4860::/64"
          }]
        ],
        "routes": [
          { "dst": "0.0.0.0/0" },
          { "dst": "::/0" }
        ]
      }
    },
    {
      "type": "portmap",
      "capabilities": {"portMappings": true}
    }
]可以看到上面的 IP 段恰好就是 10.88.0.0/16,但是这个 cni 插件类型是 bridge 网络,网桥的名称为 cni0:
8: cni0: <BROADCAST,MULTICAST,PROMISC,UP,LOWER_UP> mtu 1500 qdisc noqueue state UP group default qlen 1000
    link/ether 1a:9e:91:4a:c7:87 brd ff:ff:ff:ff:ff:ff
    inet 10.88.0.1/16 brd 10.88.255.255 scope global cni0
       valid_lft forever preferred_lft forever
    inet6 2001:4860:4860::1/64 scope global
       valid_lft forever preferred_lft forever
    inet6 fe80::189e:91ff:fe4a:c787/64 scope link
valid_lft forever preferred_lft forever但是使用 bridge 网络的容器无法跨多个宿主机进行通信,跨主机通信需要借助其他的 cni 插件,比如上面我们安装的 Flannel,或者 Calico 等等,由于我们这里有两个 cni 配置,所以我们需要将 10-containerd-net.conflist 这个配置删除,因为如果这个目录中有多个 cni 配置文件,kubelet 将会使用按文件名的字典顺序排列的第一个作为配置文件,所以前面默认选择使用的是 containerd-net 这个插件。
mv /etc/cni/net.d/10-containerd-net.conflist /etc/cni/net.d/10-containerd-net.conflist.bak
ifconfig cni0 down && ip link delete cni0
systemctl daemon-reload
systemctl restart containerd kubelet然后记得重建 coredns 和 dashboard 的 Pod,重建后 Pod 的 IP 地址就正常了:
kubectl get pods -n kube-system -o wide -l k8s-app=kube-dns
NAME                       READY   STATUS    RESTARTS   AGE   IP           NODE    NOMINATED NODE   READINESS GATES
coredns-7d89d9b6b8-mb59w   1/1     Running   0          11s   10.244.1.2   node1   <none>           <none>
coredns-7d89d9b6b8-rlfzw   1/1     Running   0          22s   10.244.2.2   node2   <none>           <none>

root@master1:/k8s-data/system-yaml# kubectl get pods -n kubernetes-dashboard -o wide
NAME                                         READY   STATUS    RESTARTS   AGE   IP           NODE    NOMINATED NODE   READINESS GATES
dashboard-metrics-scraper-856586f554-8jbzl   1/1     Running   0          42s   10.244.1.3   node1   <none>           <none>
kubernetes-dashboard-67484c44f6-p64d7 1/1 Running 0 23s 10.244.2.3 node2 <none> <none>10: cni0: <BROADCAST,MULTICAST,UP,LOWER_UP> mtu 1450 qdisc noqueue state UP group default qlen 1000
link/ether d6:5a:fd:a0:dd:50 brd ff:ff:ff:ff:ff:ff
inet 10.244.1.1/24 brd 10.244.1.255 scope global cni0
valid_lft forever preferred_lft forever
inet6 fe80::d45a:fdff:fea0:dd50/64 scope link
valid_lft forever preferred_lft forever查看 Dashboard 的 NodePort 端口:
kubectl get svc -n kubernetes-dashboard
NAME                        TYPE        CLUSTER-IP      EXTERNAL-IP   PORT(S)         AGE
dashboard-metrics-scraper   ClusterIP   10.98.120.247   <none>        8000/TCP        16m
kubernetes-dashboard NodePort 10.98.30.97 <none> 443:30036/TCP 16m然后可以通过上面的 30036 端口去访问 Dashboard,要记住使用 https

然后创建一个具有全局所有权限的用户来登录 Dashboard:(admin.yaml)
kind: ClusterRoleBinding
apiVersion: rbac.authorization.k8s.io/v1
metadata:
  name: admin
roleRef:
  kind: ClusterRole
  name: cluster-admin
  apiGroup: rbac.authorization.k8s.io
subjects:
  - kind: ServiceAccount
    name: admin
    namespace: kubernetes-dashboard
---
apiVersion: v1
kind: ServiceAccount
metadata:
  name: admin
namespace: kubernetes-dashboard直接创建:
kubectl apply -f admin.yaml
root@master1:/k8s-data/system-yaml# kubectl get secret -n kubernetes-dashboard|grep admin-token
admin-token-n67hl                  kubernetes.io/service-account-token   3      7s


root@master1:/k8s-data/system-yaml# kubectl get secret admin-token-n67hl -o jsonpath={.data.token} -n kubernetes-dashboard |base64 -d
eyJhbGciOiJSUzI1NiIsImtpZCI6IkJUN1ZoRDFvdlZaSG1EOGViM0N3eGtoaU9od2ttSjJvcE9WQV80aDlIV1EifQ.eyJpc3MiOiJrdWJlcm5ldGVzL3NlcnZpY2VhY2NvdW50Iiwia3ViZXJuZXRlcy5pby9zZXJ2aWNlYWNjb3VudC9uYW1lc3BhY2UiOiJrdWJlcm5ldGVzLWRhc2hib2FyZCIsImt1YmVybmV0ZXMuaW8vc2VydmljZWFjY291bnQvc2VjcmV0Lm5hbWUiOiJhZG1pbi10b2tlbi1uNjdobCIsImt1YmVybmV0ZXMuaW8vc2VydmljZWFjY291bnQvc2VydmljZS1hY2NvdW50Lm5hbWUiOiJhZG1pbiIsImt1YmVybmV0ZXMuaW8vc2VydmljZWFjY291bnQvc2VydmljZS1hY2NvdW50LnVpZCI6IjE0Zjc3MzFlLTk0MTQtNDU4MC05MDk1LWE0MTBjZDFkZDhhYSIsInN1YiI6InN5c3RlbTpzZXJ2aWNlYWNjb3VudDprdWJlcm5ldGVzLWRhc2hib2FyZDphZG1pbiJ9.tNjHtr6aBvR4kvdaxb6xr0kRd6YbdmVrM-MU8puEHQYnoncVXaRy7CI9MZ1cVvD89yled-WFSUWnkYDSP4CcjSvqPTpulJku5yTM-JEEdJQSav7nOLnhqdNScpO8Iqo_U1KVirN5zO_sBDjBnA6qX1vYhhZGy43NGXLTCiQXS6Sv4zIXH6VhsuM5wvoYHayIKAqZ7upcWK7fHnixbOoC4xvEjRy7StUfdrGXOaakaF5KdrKVTwtwYlK3URFGNIWNoQi7eOSsu-7ITQRESB40PxVnrGLaWCjOURX3AC-hYNO3qraPHuXIsiGr-XlOfX32Ub8KA-jtEHJ7iIc_N4Tmjwroot@master1:/k8s-dataeyJhbGciOiJSUzI1NiIsImtpZCI6IkJUN1ZoRDFvdlZaSG1EOGViM0N3eGtoaU9od2ttSjJvcE9WQV80aDlIV1EifQ.eyJpc3MiOiJrdWJlcm5ldGVzL3NlcnZpY2VhY2NvdW50Iiwia3ViZXJuZXRlcy5pby9zZXJ2aWNlYWNjb3VudC9uYW1lc3BhY2UiOiJrdWJlcm5ldGVzLWRhc2hib2FyZCIsImt1YmVybmV0ZXMuaW8vc2VydmljZWFjY291bnQvc2VjcmV0Lm5hbWUiOiJhZG1pbi10b2tlbi1uNjdobCIsImt1YmVybmV0ZXMuaW8vc2VydmljZWFjY291bnQvc2VydmljZS1hY2NvdW50Lm5hbWUiOiJhZG1pbiIsImt1YmVybmV0ZXMuaW8vc2VydmljZWFjY291bnQvc2VydmljZS1hY2NvdW50LnVpZCI6IjE0Zjc3MzFlLTk0MTQtNDU4MC05MDk1LWE0MTBjZDFkZDhhYSIsInN1YiI6InN5c3RlbTpzZXJ2aWNlYWNjb3VudDprdWJlcm5ldGVzLWRhc2hib2FyZDphZG1pbiJ9.tNjHtr6aBvR4kvdaxb6xr0kRd6YbdmVrM-MU8puEHQYnoncVXaRy7CI9MZ1cVvD89yled-WFSUWnkYDSP4CcjSvqPTpulJku5yTM-JEEdJQSav7nOLnhqdNScpO8Iqo_U1KVirN5zO_sBDjBnA6qX1vYhhZGy43NGXLTCiQXS6Sv4zIXH6VhsuM5wvoYHayIKAqZ7upcWK7fHnixbOoC4xvEjRy7StUfdrGXOaakaF5KdrKVTwtwYlK3URFGNIWNoQi7eOSsu-7ITQRESB40PxVnrGLaWCjOURX3AC-hYNO3qraPHuXIsiGr-XlOfX32Ub8KA-jtEHJ7iIc_N4Tmjw然后用上面的 base64 解码后的字符串作为 token 登录 Dashboard 即可,新版本还新增了一个暗黑模式:
最终我们就完成了使用 kubeadm 搭建 v1.22.1 版本的 kubernetes 集群、coredns、ipvs、flannel、containerd。
清理
如果你的集群安装过程中遇到了其他问题,我们可以使用下面的命令来进行重置:
kubeadm reset
ifconfig cni0 down && ip link delete cni0
ifconfig flannel.1 down && ip link delete flannel.1
rm -rf /var/lib/cni/kubeadm reset
systemctl daemon-reload
systemctl restart kubelet
iptables -F && iptables -t nat -F && iptables -t mangle -F && iptables -X